
Saturday, February 1, 2014
Back for an Update
It has been way too long.
Married life and my day job have made blogging here a low priority for a very long time. Well some things have settled and I'll be updating a bit here.
I won't be doing a lot of pedal and amp builds these days, but lots of repairs and an increasing amount of guitar repair.
I'll be looking forward to posting on some of these and showing people what's on the bench.

Monday, January 2, 2012

Thursday, December 29, 2011
The Fenton Project VIII
The amp is assembled and we are doing the real testing.
The initial tryout was with a Marshall 2x12 cab and my Gibson Nighthawk.
This amp is a little screamer. Fat, blooming overdrive. Tons of gain! Too much? This is where you get questions that will drive you crazy. Perspective is everything. What I'm loving is that it does like to take off, just grab a note and feed it back if you let it. Nice. Hit a note, bend it up, let the feedback catch, then slowly bend back and it catches the octave harmonic and feeds that back. Sweet.
That Nighthawk has a huge bridge Pup and the neck I have in there is no softy either. Hmmm, it sounds good, maybe great, but ... Some clean is essential. This starts breaking up real early. But it all works and well and the sound is there. Time to try it with the speaker and cab it will live with and more typical guitars.
In the cab with a Tele. Now we're talking. I can dial in however much gain I want off the guitar. Just set the volume on the amp for however much max gain I'll want, set that tone control to be as bright as I'd ever want and work the controls on the guitar. The tone control is very interactive with the volume, much the way a "bright" switch has little effect when the volume is turned up. Not a very severe affect either, just dials in more or less treble and bass. Nice.
Tried it with my Strat with Duncan Classic Live Wire, active pickups. It liked that too. Same with the Hamer with Rio Grande Bastard P90-ish pickups.
The overall tone is very open and broad and strongly reflects the guitar. Some amps tend to homogenize things, this one just makes the guitar louder and adds however much gain and overdrive you like.
The acid test -- how's it play in church? Perfectly well behaved. Was mostly clean for this set and it handled it very well. The Volume on the amp was around 10 o'clock and the guitar was mostly down for the clean stuff and only got wound up for one song. It behaved very nicely on the edge of break up. Many amps tend to give you something like a clean tone, but with fur on it. This was just a clear crunching tone at that point.
All in all, I'm gruntled and the amp ships soon.
The initial tryout was with a Marshall 2x12 cab and my Gibson Nighthawk.
This amp is a little screamer. Fat, blooming overdrive. Tons of gain! Too much? This is where you get questions that will drive you crazy. Perspective is everything. What I'm loving is that it does like to take off, just grab a note and feed it back if you let it. Nice. Hit a note, bend it up, let the feedback catch, then slowly bend back and it catches the octave harmonic and feeds that back. Sweet.
That Nighthawk has a huge bridge Pup and the neck I have in there is no softy either. Hmmm, it sounds good, maybe great, but ... Some clean is essential. This starts breaking up real early. But it all works and well and the sound is there. Time to try it with the speaker and cab it will live with and more typical guitars.
In the cab with a Tele. Now we're talking. I can dial in however much gain I want off the guitar. Just set the volume on the amp for however much max gain I'll want, set that tone control to be as bright as I'd ever want and work the controls on the guitar. The tone control is very interactive with the volume, much the way a "bright" switch has little effect when the volume is turned up. Not a very severe affect either, just dials in more or less treble and bass. Nice.
Tried it with my Strat with Duncan Classic Live Wire, active pickups. It liked that too. Same with the Hamer with Rio Grande Bastard P90-ish pickups.
The overall tone is very open and broad and strongly reflects the guitar. Some amps tend to homogenize things, this one just makes the guitar louder and adds however much gain and overdrive you like.
The acid test -- how's it play in church? Perfectly well behaved. Was mostly clean for this set and it handled it very well. The Volume on the amp was around 10 o'clock and the guitar was mostly down for the clean stuff and only got wound up for one song. It behaved very nicely on the edge of break up. Many amps tend to give you something like a clean tone, but with fur on it. This was just a clear crunching tone at that point.
All in all, I'm gruntled and the amp ships soon.
Tuesday, December 20, 2011
The Fenton Project VII
Everything is wired and time to test!!!!!
As with any new build or extensive overhaul it's best to power up slowly. A variac works well, to apply power gradually. I prefer the safety light approach. It reacts faster than I can read a current meter and it's more or less automatic. A 100 watt bulb will limit maximum current to something under one Amp and that is low enough that no serious damage would result from any problems.
Good thing I didn't trim the Output Transformer primary leads to length - as feared they were out of phase with the rest of the circuit and needed to be reversed. This is one of those things that are easier to identify with a function test than by pulsing the tranny and testing phase.
Now that everything works let's run it up on the scope and see what we get. Ooh, lots of gain. Bias check shows the power tubes dropping 13V across the 150 Ohm Cathode resistor; we've got 370V at the plate for a static dissipation of 15.5W per tube. A bit hot but no hotter than a lot of other EL84 amps. We'll run with this for now. Once we've got a baseline on the sound we'll see if cooling them off doesn't hurt.
Running it up into an 8 Ohm dummy load we get 18WRMS at 400Hz as the top and bottom of the waveform start to round off. Pretty much what you'd expect. Run a few different frequencies and some square wave to test the tone control. Time for a half power / one hour burn in. Everything appears solid and stable, nothing overheats and no extraneous noise appears on the 'scope.
Now for a real test - the test instrument is a Marshall 1936 2x12 cabinet. Plug in, power up, dead quiet. Turn everything up and there's the expected shhhhh of gain noise, but that's all there is no hum, sizzle or buzz. Now the guitar ...
As with any new build or extensive overhaul it's best to power up slowly. A variac works well, to apply power gradually. I prefer the safety light approach. It reacts faster than I can read a current meter and it's more or less automatic. A 100 watt bulb will limit maximum current to something under one Amp and that is low enough that no serious damage would result from any problems.
Good thing I didn't trim the Output Transformer primary leads to length - as feared they were out of phase with the rest of the circuit and needed to be reversed. This is one of those things that are easier to identify with a function test than by pulsing the tranny and testing phase.
Now that everything works let's run it up on the scope and see what we get. Ooh, lots of gain. Bias check shows the power tubes dropping 13V across the 150 Ohm Cathode resistor; we've got 370V at the plate for a static dissipation of 15.5W per tube. A bit hot but no hotter than a lot of other EL84 amps. We'll run with this for now. Once we've got a baseline on the sound we'll see if cooling them off doesn't hurt.
Running it up into an 8 Ohm dummy load we get 18WRMS at 400Hz as the top and bottom of the waveform start to round off. Pretty much what you'd expect. Run a few different frequencies and some square wave to test the tone control. Time for a half power / one hour burn in. Everything appears solid and stable, nothing overheats and no extraneous noise appears on the 'scope.
Now for a real test - the test instrument is a Marshall 1936 2x12 cabinet. Plug in, power up, dead quiet. Turn everything up and there's the expected shhhhh of gain noise, but that's all there is no hum, sizzle or buzz. Now the guitar ...
Monday, December 19, 2011
The Fenton Project VI
We are close to the limits of my understanding of Roman Numerals (all of which is learned, like every American, from the Super Bowl) and my photographic limitations are taking a toll.
When we left off, I had connected the main power supply wiring, leaving the power cord for last so it wouldn't get in the way on the bench. Now it's time for the output transformer.

Early on, I was thinking to break out the wire lacing ribbon and go old-school HiWatt on it. However, the necessity of just getting this thing done sorta became a priority. The hand lacing is beautiful, but wire ties work too and since I'm only making one of these there isn't time to build the sort of wiring jig that would make lacing fast. You'll note that I left the primaries of the Output Tranny long enough to swap. Having had a painful formative experience with a mis-marked transformer I always do this until the phase is confirmed and then clean up the excess lead.

With the back of the amp wired up, now it's time to do the front. It's much easier to do this stuff without other things in the way. Yes, shielded wire on the low level stuff like from the input jack to the first stage and from the volume/tone controls back to the recovery stage. Why? Because I can. It doesn't cost much and could save time later. Anyone who has ever had to futz with the green wires in an old Marshall to get them exactly where they belong (just so high above the chassis, not near this, not too high) will understand.

So let's drop the board in and wire it up. Here is where the planning pays off. This part went fast and smooth enough I just got in a groove and neglected to take pictures.
 A little front end detail.
 Here she is ready for tubes and applied voltage.
 There's the cute little back side. The stacked jacks are 4 Ohms. The only reason I could see for adding a pair of 8 Ohm jacks is to run a full stack. Doesn't look likely. But running this with an extension cab seems real probable so let's make it easy.

Pretty, isn't it. I like the big Alco knobs. I use them on everything. Great look and feel.
Next phase is to power up, do some testing and detailing on the wiring - then to fit it in the cab and rock out a little.
When we left off, I had connected the main power supply wiring, leaving the power cord for last so it wouldn't get in the way on the bench. Now it's time for the output transformer.

Early on, I was thinking to break out the wire lacing ribbon and go old-school HiWatt on it. However, the necessity of just getting this thing done sorta became a priority. The hand lacing is beautiful, but wire ties work too and since I'm only making one of these there isn't time to build the sort of wiring jig that would make lacing fast. You'll note that I left the primaries of the Output Tranny long enough to swap. Having had a painful formative experience with a mis-marked transformer I always do this until the phase is confirmed and then clean up the excess lead.

With the back of the amp wired up, now it's time to do the front. It's much easier to do this stuff without other things in the way. Yes, shielded wire on the low level stuff like from the input jack to the first stage and from the volume/tone controls back to the recovery stage. Why? Because I can. It doesn't cost much and could save time later. Anyone who has ever had to futz with the green wires in an old Marshall to get them exactly where they belong (just so high above the chassis, not near this, not too high) will understand.

So let's drop the board in and wire it up. Here is where the planning pays off. This part went fast and smooth enough I just got in a groove and neglected to take pictures.
 A little front end detail.
 Here she is ready for tubes and applied voltage.
 There's the cute little back side. The stacked jacks are 4 Ohms. The only reason I could see for adding a pair of 8 Ohm jacks is to run a full stack. Doesn't look likely. But running this with an extension cab seems real probable so let's make it easy.
Pretty, isn't it. I like the big Alco knobs. I use them on everything. Great look and feel.
Next phase is to power up, do some testing and detailing on the wiring - then to fit it in the cab and rock out a little.
Sunday, December 18, 2011
The Fenton Project V
Here we have the chassis drilled, punched and the first few bits mounted. Came up with a very nice NOS ceramic socket for the rectifier tube. Those get hot and this one won't care. Nice silver plated contacts, too. So it's time to start connecting stuff. This will work in layers, starting with heaters and primary power supply.
 And, a quick look underneath. What photo's can't show is the thought process behind laying this out. I tend to spend a lot of time thinking on these things, scribbling, shoving parts around and trying to reach the best of all the compromises involved. And the longer you go at that, the closer you get to very conventional, established practice. But, every detail you can improve does that much more to lower the noise floor and improve reliability and tone.

Once you mount the Power Transformer and start wiring things up the orientation of the tube sockets makes sense.

The basic rule of heater wiring is that you want to keep it away from signal wires. The two main approaches are to either keep the signals near the chassis and the heaters up in the air as in Fender amps. The other, more often British approach is to keep the heaters low and away from the signal circuits. Here they run to the corner of the chassis where the only wiring they'll be near is the Output Transformer primary and secondary. Neither is susceptible to noise pickup.

That big terminal strip is sort of a divider between the dirty and clean electrical environments inside the amp. On one end is the power cord "safety" ground and on the other is the chassis ground for everything else -- on one side is the raw AC and the secondaries of the power transformer on the other is everything else in the amp with the HV to the rectifier sneaking past.

Stay tuned for our next installment when we start with the next layer of wiring and connections.
 And, a quick look underneath. What photo's can't show is the thought process behind laying this out. I tend to spend a lot of time thinking on these things, scribbling, shoving parts around and trying to reach the best of all the compromises involved. And the longer you go at that, the closer you get to very conventional, established practice. But, every detail you can improve does that much more to lower the noise floor and improve reliability and tone.
Once you mount the Power Transformer and start wiring things up the orientation of the tube sockets makes sense.

The basic rule of heater wiring is that you want to keep it away from signal wires. The two main approaches are to either keep the signals near the chassis and the heaters up in the air as in Fender amps. The other, more often British approach is to keep the heaters low and away from the signal circuits. Here they run to the corner of the chassis where the only wiring they'll be near is the Output Transformer primary and secondary. Neither is susceptible to noise pickup.

That big terminal strip is sort of a divider between the dirty and clean electrical environments inside the amp. On one end is the power cord "safety" ground and on the other is the chassis ground for everything else -- on one side is the raw AC and the secondaries of the power transformer on the other is everything else in the amp with the HV to the rectifier sneaking past.

Stay tuned for our next installment when we start with the next layer of wiring and connections.
Sunday, November 27, 2011
The Fenton Project IV
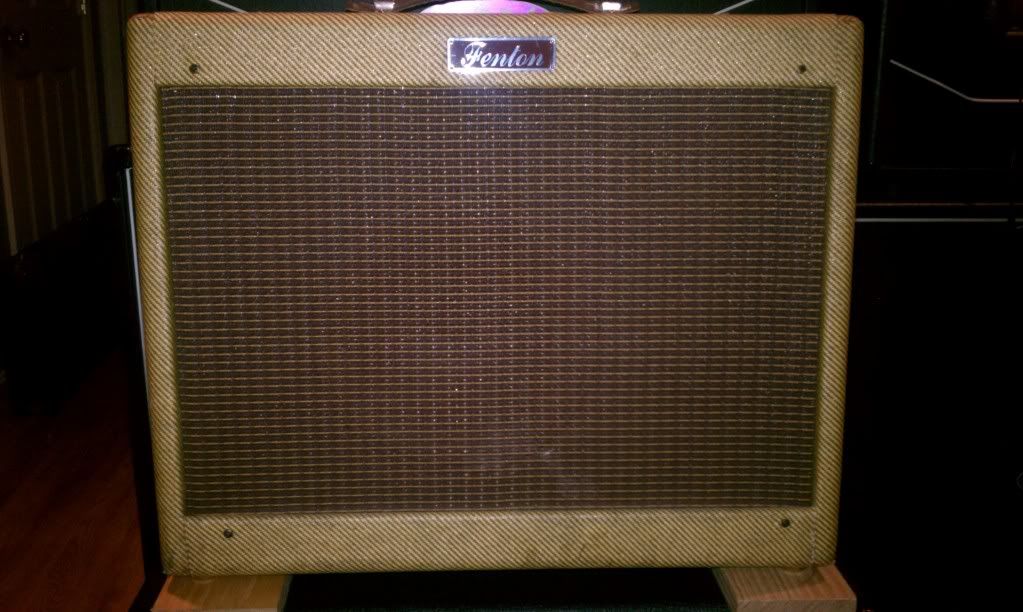
Here's some background on the amp that's inspiring this project. No surprise that an obscure but excellent sounding amp has its own thread on The Gear Page.

Saturday, November 26, 2011
The Fenton Project III

Here's the populated board with all flying leads attached looking for a home. The circuitry for each stage follows in order and parallels the tube placement so there will be a minimum of crossing wires and nothing is close that can't run together.
In the interest of a neat layout nearly everything mounts to the board. The tone control network will mount on the back of the pots, very simple and neat and the signal from the tone and volume will run directly to the next tube stage through a shielded lead.
Grounds for the preamp section are all grouped and run together to the common buss at the main filter / decoupling cap.
Next we get the chassis drilled, hardware mounted and start with the off-board wiring.
Sunday, November 20, 2011
The Fenton Project II
I'm playing catch up a little here, so this comes right on the heels of the first post of the series.
Parts have arrived, the first to come in are the very solid looking ClassicTone transformers from Magnetic Components.

They are shown here with the chassis from Dirty Dawg Amps. Just for scale, that chassis is 17 inches wide and over 2-1/2 inches deep. These are chunky. The photo does not do justice to the finish and workmanship of the chassis. Brian does great quality, fast work at a very reasonable price. That's a theme throughout this project; we are looking for above average components at a reasonable price and combining them with a good layout and workmanship for a superior amp.
The next step is combining these parts into something like a guitar amp. For the layout process I like to have parts in hand and work out the plan on paper. I know a lot of people depend on computer assistance for this phase of the job, but I just feel more comfortable holding and measuring a part as I decide where it goes.
I'll confess, this is the slowest phase of any project for me. I tend to chew on these things forever until I'm sure that everything has been considered and all of the inevitable compromises are balanced appropriately.

After a few more sketches and some trial and error fitting I had a board and control panel layout and was ready to stake down some turrets.

Now, we're getting somewhere.
In the next post we'll have the board populated and be positioning things on the chassis. Then things get marked and the chassis goes under the drill press.
Parts have arrived, the first to come in are the very solid looking ClassicTone transformers from Magnetic Components.

They are shown here with the chassis from Dirty Dawg Amps. Just for scale, that chassis is 17 inches wide and over 2-1/2 inches deep. These are chunky. The photo does not do justice to the finish and workmanship of the chassis. Brian does great quality, fast work at a very reasonable price. That's a theme throughout this project; we are looking for above average components at a reasonable price and combining them with a good layout and workmanship for a superior amp.
The next step is combining these parts into something like a guitar amp. For the layout process I like to have parts in hand and work out the plan on paper. I know a lot of people depend on computer assistance for this phase of the job, but I just feel more comfortable holding and measuring a part as I decide where it goes.
I'll confess, this is the slowest phase of any project for me. I tend to chew on these things forever until I'm sure that everything has been considered and all of the inevitable compromises are balanced appropriately.

After a few more sketches and some trial and error fitting I had a board and control panel layout and was ready to stake down some turrets.

Now, we're getting somewhere.
In the next post we'll have the board populated and be positioning things on the chassis. Then things get marked and the chassis goes under the drill press.
Monday, October 24, 2011
The Fenton Project
This is an interesting project. Commissioned by a fellow TGP'er, I am building an amp inspired by the Fenton 110. This is a variant on the classic 2xEL84 theme. Everybody and his kid brother has a Marshall 18W alike or Vox AC15-ish amp - this was different enough to be interesting and right in line with my experience with EL84 practice.
I had never heard of this company before - NB, this is not the vintage Fenton Weill - rather a small and now defunct builder. My client had tried this amp for a time and liked it, and now wanted one for himself but has been unable to find one.

A couple of things stand out about this design, and there are a few changes in store. Since we aren't going to be using the low gain input jack, that component will be omitted, which should make for better reliability (I've worked on a lot of JCM 800s with the complaint of "lo gain input works, hi gain doesn't). We're also making a change to the power supply. Our build will use some extremely beefy AC15 type iron from Magnetic Components. This means a 6CA4 rectifier tube instead of the 5Y3. The original used a Fender Deluxe Reverb type output tranny so this should be a good bit more solid.
The client has a very nice 1x12 cab that was previously occupied by a heavily modded Epiphone Valve Jr that the new amp will be designed to go into.

Updates to follow shortly.
I had never heard of this company before - NB, this is not the vintage Fenton Weill - rather a small and now defunct builder. My client had tried this amp for a time and liked it, and now wanted one for himself but has been unable to find one.

A couple of things stand out about this design, and there are a few changes in store. Since we aren't going to be using the low gain input jack, that component will be omitted, which should make for better reliability (I've worked on a lot of JCM 800s with the complaint of "lo gain input works, hi gain doesn't). We're also making a change to the power supply. Our build will use some extremely beefy AC15 type iron from Magnetic Components. This means a 6CA4 rectifier tube instead of the 5Y3. The original used a Fender Deluxe Reverb type output tranny so this should be a good bit more solid.
The client has a very nice 1x12 cab that was previously occupied by a heavily modded Epiphone Valve Jr that the new amp will be designed to go into.

Updates to follow shortly.
Saturday, October 8, 2011
I'm Back
After a long time away, I am back and blogging again.
Just to kick things off, here's an interesting failure mode that came into my day job:

It's actually easier to plug that power cord into the XLR than into the power inlet jack where it belongs. Sometimes in a design you have to consider possibilities that seem impossible.
Monday, November 29, 2010
First Look Ronsonic Diesel Driver
Here's the big, bad buffer. The Ronsonic Diesel Driver. Plug 9 - 18VDC into the jack at the top and your guitar into the jack you see on the side there.

The input impedance is matched to that of classic guitar amps. This will not load down your guitar. It also won't give it that unpleasant brittle, glassy top end that some buffers with extremely high input impedances do.
The goal here was transparency, as if nothing was added to your guitar and nothing taken away.
Then you go around to this side:

The top jack goes out to your tuner. It has its own buffer so nothing that happens there can affect your signal. Some tuners are infamous tone-hogs that will kill signal even off on a side chain. That won't happen here.
The next jack is the Send to your pedal board. This is buffered with a state-of-the-art opamp that can drive any load that will be encountered in the wild. Prototypes were built with more usual opamps that sounded good but didn't have these spec's, now we are way ahead of the bunch with great sound and impeccable technical spec's.
The third jack down is the Return from your board.
The bottom jack goes to your amp. Again this is seriously buffered and fully capable of driving huge runs of cable without signal loss. For large stages and ever more common isolation boxes this will get your signal to the amp intact and sounding great.
The switch can either bypass your pedalboard or work as a mute, silencing everything except the tuner out. Choose this option when you order. It can be changed with a simple soldered in jumper by any reasonably competent tech should you change your mind later. If you prefer, a user selectable jumper can be added at a slight extra charge. We don't recommend this as this should be a more or less permanent decision and even with the gold plated connectors we prefer the reliability of soldered connections.
Legends are hand marked on the bottom since we don't anticipate this being plugged and unplugged a lot. Mostly this will get installed on the board and forgotten except to step on it when it's time to tune. You can order top markings if you prefer in legible technician hand lettering.
We are taking orders now, no payment until we are ready to ship in 2-4 weeks. Price is $129 plus $8 flat rate shipping in the USofA.
Please email if you are interested in getting a free test run with the prototype.

The goal here was transparency, as if nothing was added to your guitar and nothing taken away.
Then you go around to this side:

The top jack goes out to your tuner. It has its own buffer so nothing that happens there can affect your signal. Some tuners are infamous tone-hogs that will kill signal even off on a side chain. That won't happen here.
The next jack is the Send to your pedal board. This is buffered with a state-of-the-art opamp that can drive any load that will be encountered in the wild. Prototypes were built with more usual opamps that sounded good but didn't have these spec's, now we are way ahead of the bunch with great sound and impeccable technical spec's.
The third jack down is the Return from your board.
The bottom jack goes to your amp. Again this is seriously buffered and fully capable of driving huge runs of cable without signal loss. For large stages and ever more common isolation boxes this will get your signal to the amp intact and sounding great.
The switch can either bypass your pedalboard or work as a mute, silencing everything except the tuner out. Choose this option when you order. It can be changed with a simple soldered in jumper by any reasonably competent tech should you change your mind later. If you prefer, a user selectable jumper can be added at a slight extra charge. We don't recommend this as this should be a more or less permanent decision and even with the gold plated connectors we prefer the reliability of soldered connections.
Legends are hand marked on the bottom since we don't anticipate this being plugged and unplugged a lot. Mostly this will get installed on the board and forgotten except to step on it when it's time to tune. You can order top markings if you prefer in legible technician hand lettering.
We are taking orders now, no payment until we are ready to ship in 2-4 weeks. Price is $129 plus $8 flat rate shipping in the USofA.
Please email if you are interested in getting a free test run with the prototype.
Tuesday, October 26, 2010
Hero / Guru Pedal
Just got some photos in of a current Hero/Guru dual pedal.

Pretty huh?
Here's the gut shot. Because it should be pretty on the inside too.


Pretty huh?
Here's the gut shot. Because it should be pretty on the inside too.

Monday, October 11, 2010
Time for an Update.
Wow, way overdue for an update. The big action around here is still the development of the Diesel Driver Buffer. That's right my obsessive compulsive pursuit of the ultimate guitar buffer pedal/system continues. Prototypes have been built and electronically they are almost there. I'm still auditioning driver IC's, it works well and sounds excellent with a very common type, but I'm still looking for a high performance driver that is as smooth and uncolored.
One Diesel Driver has made it into a customer's hands and is now in service after being auditioned against a CAE buffer.
The first prototype circuit boards answered all the questions they were supposed to. Now I've ordered samples of what I hope and expect will be the final design. I'm hoping to have a Tour Box going out before Halloween. So if you're interested in trying this bad boy out, hit the email button and let me know.
Other business proceeds apace. Still doing repairs and finding time to play guitar again.
Stay well and healthy. Be back with more soon.
One Diesel Driver has made it into a customer's hands and is now in service after being auditioned against a CAE buffer.
The first prototype circuit boards answered all the questions they were supposed to. Now I've ordered samples of what I hope and expect will be the final design. I'm hoping to have a Tour Box going out before Halloween. So if you're interested in trying this bad boy out, hit the email button and let me know.
Other business proceeds apace. Still doing repairs and finding time to play guitar again.
Stay well and healthy. Be back with more soon.
Monday, September 6, 2010
Been Busy
Been busy building and prototyping pedals and revising and updating the PCBs. Progress is sweet but slow.
In the meanwhile, go enjoy some FX pedal history. There you'll find the history of Fuzz as seen from the Country music perspective. Lots of great links to musical samples and examples.
GO! Now!
In the meanwhile, go enjoy some FX pedal history. There you'll find the history of Fuzz as seen from the Country music perspective. Lots of great links to musical samples and examples.
GO! Now!
Monday, August 16, 2010
The Boards Have Landed
The prototypes of the new PCBs for the Ronsonic Diesel Drive Buffer have arrived. They look good, very good. I'm building them up now and am already planning improvements for the production version.
It's funny you look at a schematic on the screen for months, study and craft the circuit board on screen and on paper for weeks and then you get the thing in your hands and improvements become obvious. The good news is that there are no errors to correct, only improvements in layout and assembly.
The Electric Guru and Hero boards are also in. These are a lot nicer than the original builds. I'll be assembling a couple of single and dual pedals to go off in a couple of Tour Boxes I'm planning. So be ready for the announcement.
The next couple of posts will discuss some of these pedals in a general way, the various types of buffers, history and use of treble boosters and like that. So stay tuned for some pedal geek goodness.
It's funny you look at a schematic on the screen for months, study and craft the circuit board on screen and on paper for weeks and then you get the thing in your hands and improvements become obvious. The good news is that there are no errors to correct, only improvements in layout and assembly.
The Electric Guru and Hero boards are also in. These are a lot nicer than the original builds. I'll be assembling a couple of single and dual pedals to go off in a couple of Tour Boxes I'm planning. So be ready for the announcement.
The next couple of posts will discuss some of these pedals in a general way, the various types of buffers, history and use of treble boosters and like that. So stay tuned for some pedal geek goodness.
Thursday, July 29, 2010
New Circuit Boards On The Way
Big news on several projects.
The big project for the last couple of months has been preparing the new Diesel Drive Buffer for production. This is the monster buffer project that I described previously. The original target price of $100 is now deemed hopeless, too many compromises would be necessary to get there. It would still be a better than typical product, but why do "better" when "awesome" is within reach. This does not use your usual twelve cent transistors or fifty cent ICs; it is all top shelf parts all the way. And this is an application that will reward the investment.
The order has been placed with the board house for prototypes of the new circuit board. They will be here in a couple of weeks and we'll get this thing off the breadboard and onto the pedalboard for some serious workouts. It's very hard to demonstrate a buffer pedal in a recording of video, but I've got a few ideas about how to show what this beast can do.
I am also revisiting a couple of classics. The Hero Overdrive and Electric Guru Treble Booster are also getting new circuit board designs. These boards will both speed production and produce a more reliable pedal. None of the existing pedals have had any circuit related failures, but these will just be that much more robust.
Thanks for checking in, I'll keep you posted on any new developments.
The big project for the last couple of months has been preparing the new Diesel Drive Buffer for production. This is the monster buffer project that I described previously. The original target price of $100 is now deemed hopeless, too many compromises would be necessary to get there. It would still be a better than typical product, but why do "better" when "awesome" is within reach. This does not use your usual twelve cent transistors or fifty cent ICs; it is all top shelf parts all the way. And this is an application that will reward the investment.
The order has been placed with the board house for prototypes of the new circuit board. They will be here in a couple of weeks and we'll get this thing off the breadboard and onto the pedalboard for some serious workouts. It's very hard to demonstrate a buffer pedal in a recording of video, but I've got a few ideas about how to show what this beast can do.
I am also revisiting a couple of classics. The Hero Overdrive and Electric Guru Treble Booster are also getting new circuit board designs. These boards will both speed production and produce a more reliable pedal. None of the existing pedals have had any circuit related failures, but these will just be that much more robust.
Thanks for checking in, I'll keep you posted on any new developments.
Hero Pedal with Down By Law - LIVE.
That last video was sweet. Now back to what we normally do around here. Rock out.
That was Sam with Down by Law in Brazil. Yeah, the video is a bit crude, but whaddya want, it still rocks.
Monday, July 19, 2010
Daily Diversion
I know little about Jewel or her music. But what I see in this video, I like. She's a good sport and that's a great crowd.
Saturday, July 17, 2010
More Dirt Removal
So, we've talked about preventing problems by exercising all the controls and jacks. We've turned all the knobs and flipped all the switches and run a plug in and out of all the jacks. So anything still not working right needs more than just exercise. Almost everything here applies to pedals and guitar electronics as well as to amps.
Mostly we're going to approach this from the point of view of solving a problem. You may not need to address everything discussed here. If you've got a noisy switch or a jack that hums when nothing is plugged in you might not want to do the whole amp, especially if it is otherwise clean and in good shape. But if you've got something that's been left in a shed or has a lot of obscure noises, get it all.
Let me introduce my favorite product in the world. Caig Deoxit D5.
You need a can of this. It isn't cheap, $12 - 18 for the size shown but it will last a long time and do a tremendous amount of good while it lasts. There are other worthwhile contact cleaners, but as long as I've been using this I haven't needed another. The one thing that does not work is WD40. Save that for cleaning bike parts and keeping your tools from rusting. WD40 leaves a lot of oil behind that dries into a hard and unpleasant varnish. If you use it on something you will need to use it again because of it. Then you'll need something else to flush out all the old WD40.
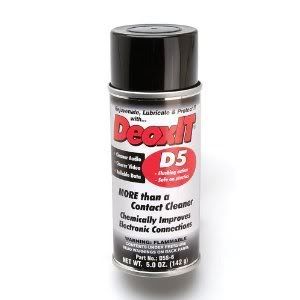
One other reason to use D5, it is completely benign to tolex, plastic, guitar finishes (even nitrocellulose lacquer) and, so far as I can tell, human beings. Don't drink the stuff, but I have gotten it in my eye and even that doesn't burn. Here's the MSDS.
So get your can of D5 and some tools if that is where this next phase takes us. Notice that the nozzle turns to adjust the spray, you'll want that at the lowest setting.
Tube Sockets and Grotty Tube Pins
For tube sockets, give a small small spray either directly at the socket or on the tube pins and run the tube in and out of the socket. Allow to dry before firing up the amp. Some tube pins tend to corrode in really ugly ways. The pins on small 9 pin tubes, like 12AX7s require some very fancy metallurgy. Because they go through the glass they have to expand and contract with heat in a way that is compatible with the glass. Normal metals won't do this, so corrosion resistant alloys are out of the question. Use a shot of Deoxit and a bit of 3M scotch brite to clean heavy corrosion. Sandpaper also works. Never use a file on a tube pin it, the vibrations will damage the tube.
We test for dirty pins by firing up the amp and listening while pushing the tube around a little in the socket. Start with the controls set low, no reason to blast yourself. If there's a problem it will be obvious. So, clean, let dry, power up and test. Just put a finger tip on the top of the tube and move it gently. If one cleaning does not do the job, repeat it.
Control Pots
We need access to the controls for this. It is rarely rewarding to try to clean a pot by spraying around the shaft and hoping the cleaner gets in. It's worth a try as a desperation move on a sealed pot, but not normally worth it. So open up the amp. All the normal safety warnings apply. Unplug and use a DC voltmeter to ensure that the voltages in the amp have drained. If you don't understand that, do not proceed.
With the amp open, look at the pot in the area where the terminals come out to be soldered to the wires or to the circuit board. Generally there will be window in the metal can around the terminals. Some pots will also have a hole in the case.
A short spray into either of these openings followed by exercising the pot will do the job. These do not get hot so you can feel free to test immediately. Do be sure the amp is correctly connected and safe before applying power. The usual rule is that a pot that does not operate cleanly after two cleaning attempts should be replaced. Do know that some controls will always be a little noisy, the "Presence" control on Marshalls is one example. Some pedals will also misbehave like that.
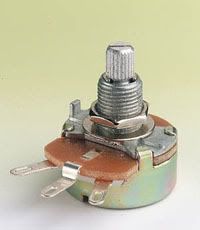
As a general rule any pot with DC current flowing through it will make noise. This can be an important diagnostic tool. If you find a pot that is noisy when turned that does not improve with cleaning and you notice that the noisy spots in the pots rotation never move when you spray or exercise it you likely have a DC voltage on that pot. This can help locate a leaky coupling capacitor or failing opamp.
Jacks
A quick spritz of Deoxit into the jack an running a plug in and out will solve most jack problems. Including dirt on the shorting leaf of the input jacks on an amp. This is the introductory course so we won't talk about the use of a burnishing tool for the ones that don't respond. Again, if repeated cleaning attempts fail, it is probably best to replace the jack.
Everything Else
In most modern amps you are going to find connectors like this: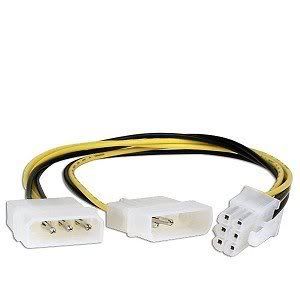
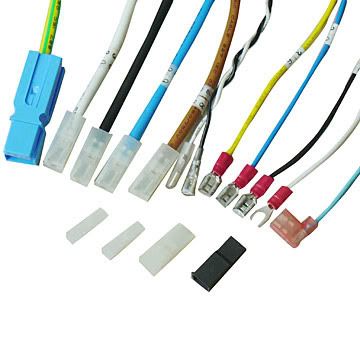 You'll find these push on connectors throughout many amps and almost always connecting speakers. It is good practice to clean them every few years, especially if you've got noise problems. Give the connector a short spray of D5 before removing it, this will make it a lot easier if there is any corrosion already there. Pull and push it back down a couple of times. On some amps, this could keep you busy awhile.
Be careful of any connectors that aren't indexed. Make sure everything goes back just as it was. Some multi-pin connectors will have a latch or catch on them. Don't just yank - look.
This is also where you will find if a connector has been poorly soldered. If the pin or post comes out of the circuit board, it isn't because you did something wrong, it is because it already had a problem.
Switches
I do not recommend cleaning a malfunctioning power or standby switch. Once those have gone the least bit bad, they arc and destroy the contacts in a way that no cleaner will fix. It may not hurt to clean a functional switch, but remember that Deoxit is flammable and we do not want any fires in the amp. You'll find that most such switches are sealed anyway.
Signal switches are another matter entirely. Find an opening. Sometimes the only path into the switch is straight along the actuator shaft, usually with a spring in your way. Even those often have a small cutout on the top. You'll see if you've gotten in there. It doesn't take much. One of the important things to know about Deoxit is that the less you use the better.
The Important Trick
Using heat from a lighter or other source you can soften the spray tube and bend it into a convenient shape. Don't melt it, and don't do this on the can. Let me emphasize that do not spray Deoxit near a heat source or flame. Bend the straw then mount it to the can. The bent straw will get in a lot more places than the straight one.
The Short Version
Find all the connections in the amp, give them a shot of Deoxit and move them through their range of motion. Let dry and add power.
Congratulations. You should now have a quieter, sweeter sounding amp.
Subscribe to:
Posts (Atom)
