
Sunday, November 27, 2011
The Fenton Project IV
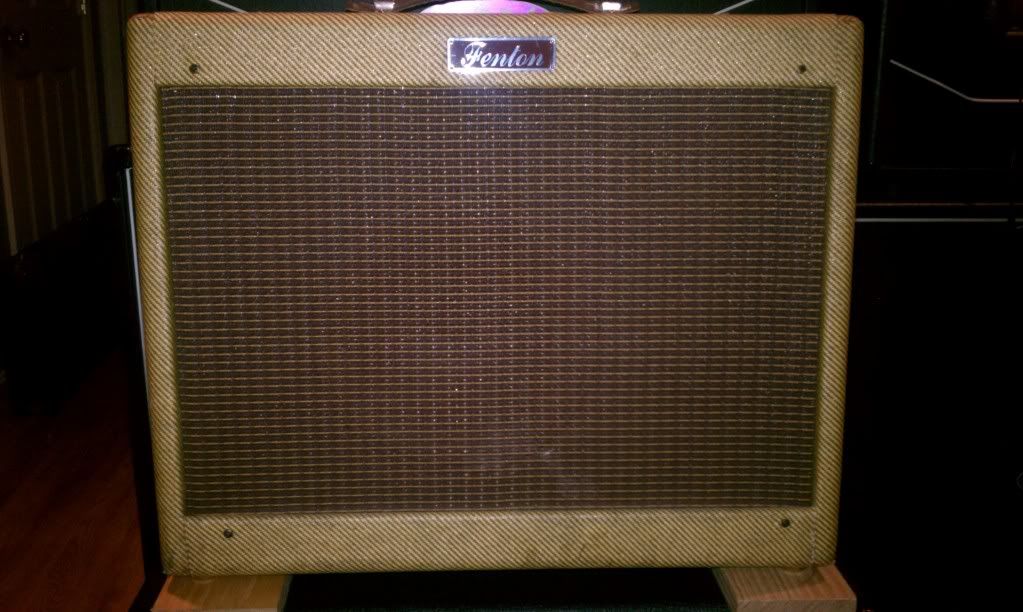
Here's some background on the amp that's inspiring this project. No surprise that an obscure but excellent sounding amp has its own thread on The Gear Page.
Saturday, November 26, 2011
The Fenton Project III

Here's the populated board with all flying leads attached looking for a home. The circuitry for each stage follows in order and parallels the tube placement so there will be a minimum of crossing wires and nothing is close that can't run together.
In the interest of a neat layout nearly everything mounts to the board. The tone control network will mount on the back of the pots, very simple and neat and the signal from the tone and volume will run directly to the next tube stage through a shielded lead.
Grounds for the preamp section are all grouped and run together to the common buss at the main filter / decoupling cap.
Next we get the chassis drilled, hardware mounted and start with the off-board wiring.
Sunday, November 20, 2011
The Fenton Project II
I'm playing catch up a little here, so this comes right on the heels of the first post of the series.
Parts have arrived, the first to come in are the very solid looking ClassicTone transformers from Magnetic Components.

They are shown here with the chassis from Dirty Dawg Amps. Just for scale, that chassis is 17 inches wide and over 2-1/2 inches deep. These are chunky. The photo does not do justice to the finish and workmanship of the chassis. Brian does great quality, fast work at a very reasonable price. That's a theme throughout this project; we are looking for above average components at a reasonable price and combining them with a good layout and workmanship for a superior amp.
The next step is combining these parts into something like a guitar amp. For the layout process I like to have parts in hand and work out the plan on paper. I know a lot of people depend on computer assistance for this phase of the job, but I just feel more comfortable holding and measuring a part as I decide where it goes.
I'll confess, this is the slowest phase of any project for me. I tend to chew on these things forever until I'm sure that everything has been considered and all of the inevitable compromises are balanced appropriately.

After a few more sketches and some trial and error fitting I had a board and control panel layout and was ready to stake down some turrets.

Now, we're getting somewhere.
In the next post we'll have the board populated and be positioning things on the chassis. Then things get marked and the chassis goes under the drill press.
Subscribe to:
Posts (Atom)